
The first time a customer asked us to light “every branch” of a big yard tree, we both looked up and realized how much that sentence contained. Every branch of a tall tree is a lot of branches. And “whole tree” means very different things depending on whether it is a six foot crabapple or a thirty foot oak.
Here is the honest answer. If you want to cover a whole tree with lights, you need a plan, not a pile of strings. A plan tells you what to wrap, in what order, with how many strands and how to reach the top without hurting yourself or the tree.
We are Elves Holiday Lighting in Howell. We light trees of every size across Livingston County, so this is the method we trust.
The short answer
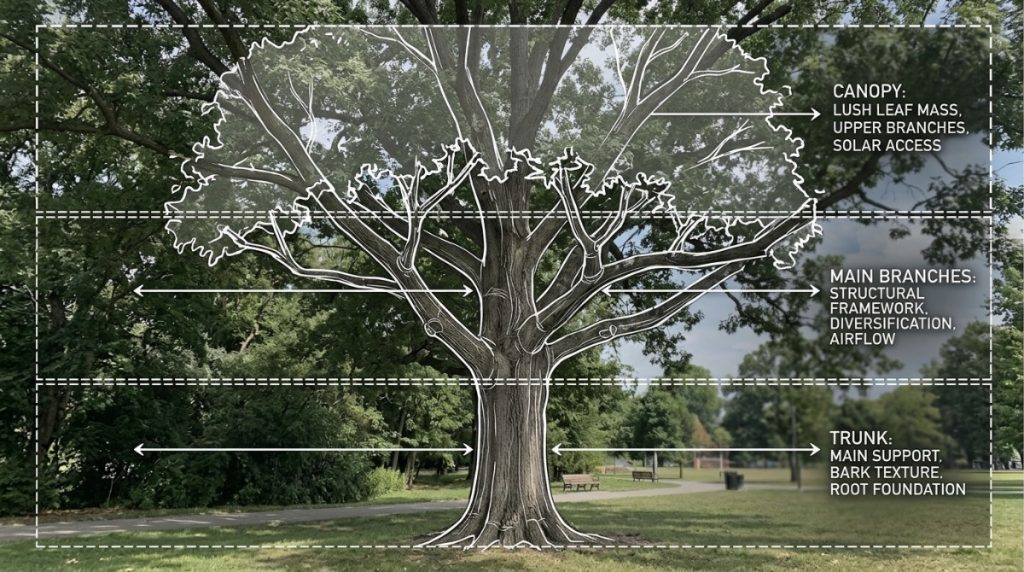
Work in three zones: trunk, main branches and canopy. Use one measured plan, test every strand on the ground first and use poles or a professional crew for anything above your safe reach.
Here is the three zone plan in short:
- Zone one, the trunk: wrap in even spirals from the base up.
- Zone two, the main branches: extend the wrap out along each major limb.
- Zone three, the canopy: drape or place lights through the upper branches and finish the top.
The rest of this guide explains each step.
Decide what “whole tree” means for your tree
Before you buy a single strand, decide how much of the tree you actually want lit.
Full coverage versus the main structure
Full coverage means lights on the trunk, every main branch and through the canopy. It gives the biggest effect, and it takes the most time and lights.
The main structure approach lights the trunk and the major limbs and stops there. On a bare winter hardwood, this alone can look striking, because the shape of the tree becomes the design.
Neither is wrong. They just fit different budgets and goals.
Small, medium and large trees
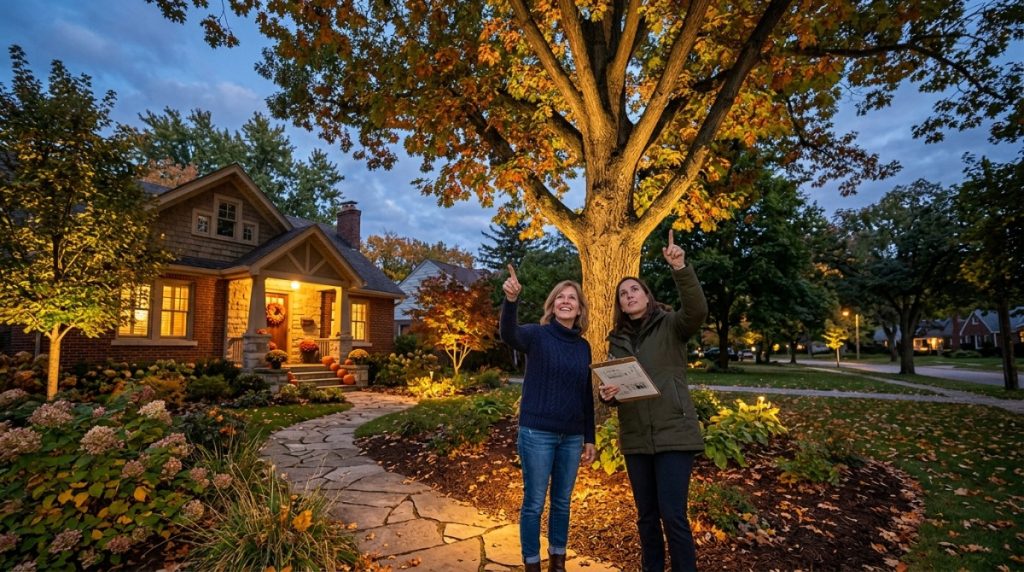
A small ornamental tree under ten feet is simple. You can often reach everything from the ground or a short ladder. A medium tree, ten to twenty feet, brings you into pole and ladder territory. A large tree over twenty feet, like a mature oak, is a bigger project, and most of the canopy sits well above safe reach.
Knowing which category you are in tells you how much planning you need.
Plan before you climb
Most patchy tree wraps come from skipping this step.
Measure trunk, branches and height
Use a soft tape or a piece of string to measure the trunk’s circumference and the height you want to wrap. Note how many main branches you plan to light and roughly how long each one is. Our guide on how many lights you need to wrap a tree walks through the math.
Choose lights and spacing
Commercial grade LED mini lights are the usual choice for trunks and branches. Larger bulbs can add accents in the canopy. For help choosing, see our guide to the best lights to wrap trees.
Plan power and strand connections
Decide where the plug will sit. Pick a spot near an outdoor outlet, and plan each strand so the cord ends there. Check the manufacturer’s maximum number of connected strands, and use outdoor rated cords.
Test and label strands on the ground
Plug in every strand before it goes up. Fix dead sections while the strand is in your hands. Then label each one with tape, such as “trunk,” “left branch” or “canopy,” so you know where each belongs. This one habit saves a lot of frustration.
Step by step: lighting a tree from trunk to top
Trunk wrap
Start at the base. Anchor the plug end, then wrap upward in even spirals. Keep the turns consistent, so the trunk glows instead of looking striped. Lighter, closer turns look fuller. Keep the wrap snug, not tight, so the bark has room to grow.
Main branches
At the first major branch, run the strand out along the limb and back, or spiral it outward as far as you can reach comfortably. Repeat for each main branch, working from the bottom up. This is what gives the tree its shape.
Canopy draping with a pole
For the upper branches, many people use a long pole to place lights over branches from the ground or a stable ladder. You drape the strand over the limb and let it hang. Space the drapes evenly so the glow looks balanced.
Top section and finishing touches
Finish at the top, then step back and look at the tree from the street. Fill any gaps, even out any heavy spots and make sure every strand is lit. Plug it in at dusk for the final check.
Reaching the top safely
This is the part that worries most people, and it should.
- Poles. A telescoping pole can place lights on higher branches from the ground. It works best on medium trees and for draping, not for precise wrapping.
- Ladders. A ladder works for lower and mid branches. Set it on firm, level ground, ask someone to hold it and never overreach.
- Lifts. A lift or bucket lets a trained worker reach tall branches safely. It is the right tool for large mature trees.
- Know when to stop. If you would need to climb into the tree, lean far out or work near power lines, stop and call a professional. No light display is worth a fall.
Even coverage: how to avoid a patchy tree
The most common complaint after a first tree wrap is that it looks lopsided. Some parts glow, and others look empty. A few habits fix that.
Light from the viewing side first. Decide where people will see the tree from, usually the street or the front door. Put the densest coverage on that side, and thin it out on the back.
Keep the spacing consistent. Spirals that tighten and loosen as you climb make the trunk look striped. Pick your gap before you start, and hold it all the way up.
Match the zones. If the trunk is very bright and the canopy is faint, the tree looks disconnected. Aim for a steady glow from bottom to top, even if the canopy uses larger bulbs.
Step back often. Every few minutes, walk to the street and look at the tree as your neighbors will. It is much easier to fix an uneven spot while you are still on site.
Plan for bare winter branches. In Michigan, most big trees lose their leaves. Lights that looked full in your head can look sparse on bare limbs, so lean toward a little more coverage on the main structure.
How many strands will you need?
Strand count depends on the tree, and it is the question we hear most after “how do I reach the top.” A small tree might need two or three strands. A mature shade tree can need dozens. Rather than guess, use a formula and plan with a buffer.
We walk through the formula, a sizing chart and worked examples in our guide on how many lights you need to wrap a tree. Running the numbers before you shop prevents the two most frustrating outcomes: running out halfway up the tree, or buying twice what you need.
Keeping the tree healthy
A lit tree should still be a healthy tree. Certified arborists share a few common cautions, and we agree.
- Wrap loosely. Lights should not squeeze bark or limbs.
- No staples or nails. They injure the tree.
- Check each season. Cords that fit last year may be tight this year as the tree grows.
- Remove lights after the holidays. Leaving them up for months or years is how cords end up embedded in bark.
We cover fastening in more detail in our guide to how to secure Christmas lights to a tree.
Practical example: lighting a 25 foot tree
Here is how we think through a tall tree. The details are general, since every tree is different.
We begin on the ground. We study the tree from the street, decide which limbs carry the shape and plan how many strands each zone needs. Strands are tested and labeled before anyone goes up.
Then we work in order: trunk first, then main branches, then canopy, and finally the top. A second person spots and hands up equipment. At the end, we step back to the street and check the glow, fixing uneven spots.
On a tree that size, the result is usually a trunk with a defined, steady glow and a canopy with enough light to read from the road. The trick is balance, not quantity.
One homeowner did the lower trunk themselves and hired us for the canopy. That hybrid worked well. They kept the easy part and handed off the part that needed height.
What a professional crew does differently
A professional crew brings a few things that are hard to match at home:
- A plan first. Strands are counted, tested and labeled before the job starts.
- The right equipment for reaching tall branches safely.
- Teams of two or more, with someone spotting.
- Experience with how much light a tree needs to look balanced.
- Insurance. Our crew is insured and CLIPA certified.
- Maintenance and takedown. We keep lights working through the season, then remove everything and store it in our heated warehouse.
Most residential installs take about 2 to 4 hours, and tree work is included in that estimate.
Frequently asked questions
How many strands for a big tree?
It depends on size and how full you want it. A large mature tree can need many strands, often more than people expect. Our sizing guide has a formula and a chart, and we can also size it for you from a photo.
How do you light the top?
With a pole, a lift or a professional crew. Do not climb into the tree. The top is where most accidents happen.
Do lights hurt trees?
Not when they are put up carefully. Loose wraps, no staples and timely removal protect the tree.
Can I use a pole?
Yes, for draping lights over branches from the ground or a stable ladder. It works best for medium trees and for canopy draping.
How long does it take?
A small tree can take under an hour. Larger trees take longer. Most residential installs with our crew take about 2 to 4 hours.
Want the whole tree done without the ladder?
If your tree is tall, we would be glad to handle it. You can even keep the parts you enjoy and hand us the tall ones. Request a free estimate and digital rendering, and we will show you the tree lit before we hang anything.
Learn more about our residential holiday lighting, read our FAQ or contact us. You can also call us at (810) 522-8950.
